huh?

This blog is all the crafts i have seen from other crafters that i want to make.

Sunday, May 30, 2010

Big bloom flower

I made my wall hanging 14 x 14 inches.

Next, I cut strips of fabric that were 2 3/4 inches wide and as long as the width of the fabric.
Then I made a basting stitch along one edge, about 1/4 inch away from the edge, to begin gathering the fabric. (Need help with gathering? Click here for more info.)
Then I placed my gathered ruffle in a circle on top of the wall hanging. Position just how you'd like it, taking note of how much of the square wall hanging you want to show from behind it. (And be sure to cover the first end with the circular shape, hiding the raw edge.)

Then place some hot glue right behind the gathered edge, securing the ruffle to the wall hanging.

Fold under and glue the very edge of your ruffle.....

.....and then glue the end down. Then gather your next piece and tuck under the end as well.

Then glue it right over the end of the first piece. But I still only glued at the base, by the gathers.

Then glue the gathered piece around in a circle, making each circle more and more narrow......moving towards the center of the flower.


When you finally reach the center, tuck the end edge under and glue the end of the strip in place.

Then fold the very end over in a diagonal line.....and then set aside for a moment while we make the center piece.

I just wrapped some scraps around my finger.....

.....and ruffled it up a bit.

And glued it to the center of the flower, using plenty of glue underneath.


Tuesday, May 4, 2010

Gum balls

hings you need:
One Pot
One pot dish (I know that isn't the technical term but I am blanking for the moment. The dish the pot sits in and catches the excess water)
A wooden wheel: like 79 cents at the crafts store

A knob: (I know I got this for cheap at home depot..like 30 cents or something:

Now take those 4 things and spray them RED!

Now, you are going to need a round fish bowl.


Now after the paint is dry...you'll need to paint on the details:
Just a gray rectangle
(make sure the pot is upside down!!!)

NOw hot glue the bowl to the upside down pot:


Then hot glue the knob and the wheel together:
Then hot glue that to the dish (upside down)
This is the lid it should fit right on the top of the bowl
Fill with bubble gum (or you could use it as a cookie jar)
Thats about 4 bucks worth of gum balls!

Cupcake stand

3 tier dessert stand...terra cotta style

Supplies:
Paint:

I sprayed a nontoxic finish on it.
assemble:


I just hot glued the two pots to the two upper stands

Thursday, April 22, 2010

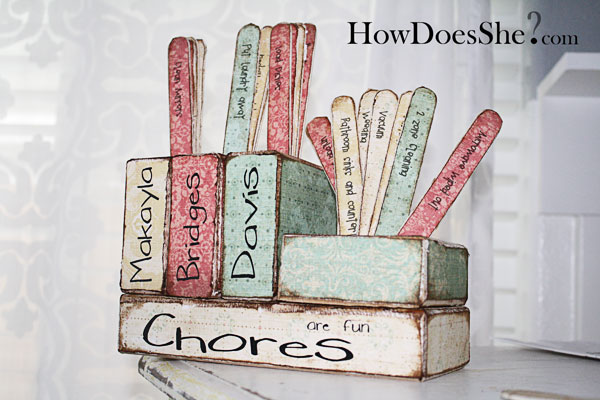
Chore Chart for Multiple Kids

chore-chart-001


'Guess Who'

memo board

Supplies: picture frame - whatever size you want, fabric (something that isn't too dark or busy so you can see your writing over it), transparency sheets,

1.) Paint picture frame if desired. You can also decorate the frame if you want too. I added some lace and a rosette to fancy mine up a bit.

2.) Take out cardboard insert from frame. Cut out your fabric a couple inches larger (on all sides) than the piece of cardboard. Iron fabric.

3.) Place cardboard on wrong side of fabric. Fold fabric over cardboard and tape down on back.
4.) If you want to add a calendar or babysitter info sheet, all you need to do is print it out on a transparency sheet. Make sure to print it on the rough side of the transparency sheet. Put this sheet in between the fabric covered cardboard and the picture frame's glass.

5.) Insert cardboard, with fabric now attached, in frame. Close frame. You're done! Easy, huh?

6.) Now you can use a dry erase marker to write on the frame's glass. You can even put a sticky back piece of velcro on the dry erase marker and the other piece on the top of the frame...so you never lose your pen!


grocery bag


You'll Need:

  • If you want your holder all one color - 1 piece of fabric, 20 x 25 inches. If you want strips like pictured here, you'll need 9 pieces of fabric, 20 x 3 1/2 inches.
  • 2 pieces of narrow elastic (1/4 wide or smaller). 11 inches and 6 1/2inches.
  • 1 piece of ribbon - 14 inches long.
  • Thread
If you're using strips, sew all of them together along their long sides (1/4 inch seams). Iron all of the seams open.


Then, make a casing for your elastic at each end. Turn over the fabric about an 1/4 of an inch and then fold it over again about 1/3 of an inch. Sew really close to the fold so that your 1/4 inch elastic can still fit. Do this to both ends.


Now, thread your elastic through each end and sew each end of the elastic securely to the opening of each end of the casing. Keep in mind, the larger piece of elastic is for the top of your holder (so you can shove many bags in) and the smaller piece of elastic is for the bottom (so that you only pull one bag out at a time).

Next, turn the holder right side out and pin the ribbon (I turned the end under once) into place, about 3/4 of an inch from the top. Sew the ribbon into place several times, making it secure.

Lastly, sew the 2 long sides together, with right sides together.
Then Hang

Followers